
DIY Tarot/Oracle Card Holder

For years and years, I only owned the yellow Rider Waite Tarot deck. Tarot intimidated me for the longest time, and I didn’t feel any connection to the style of the images on the cards. So that deck sat in a drawer for years! A few years ago, I started reading more about oracle cards and finally tried some out. I was hooked!!!!! The gorgeous images and messages just pulled me right in and felt more natural to me. It wasn’t long before I owned several decks, and then I started noticing all the pretty new tarot decks and I delved into tarot again. There were so many new decks that I could relate to with images that I wanted to know more about. I’m still working on my card reading skills, but I own about 30 decks of tarot and oracle cards now – a long way from that one Rider Waite deck I had for years!
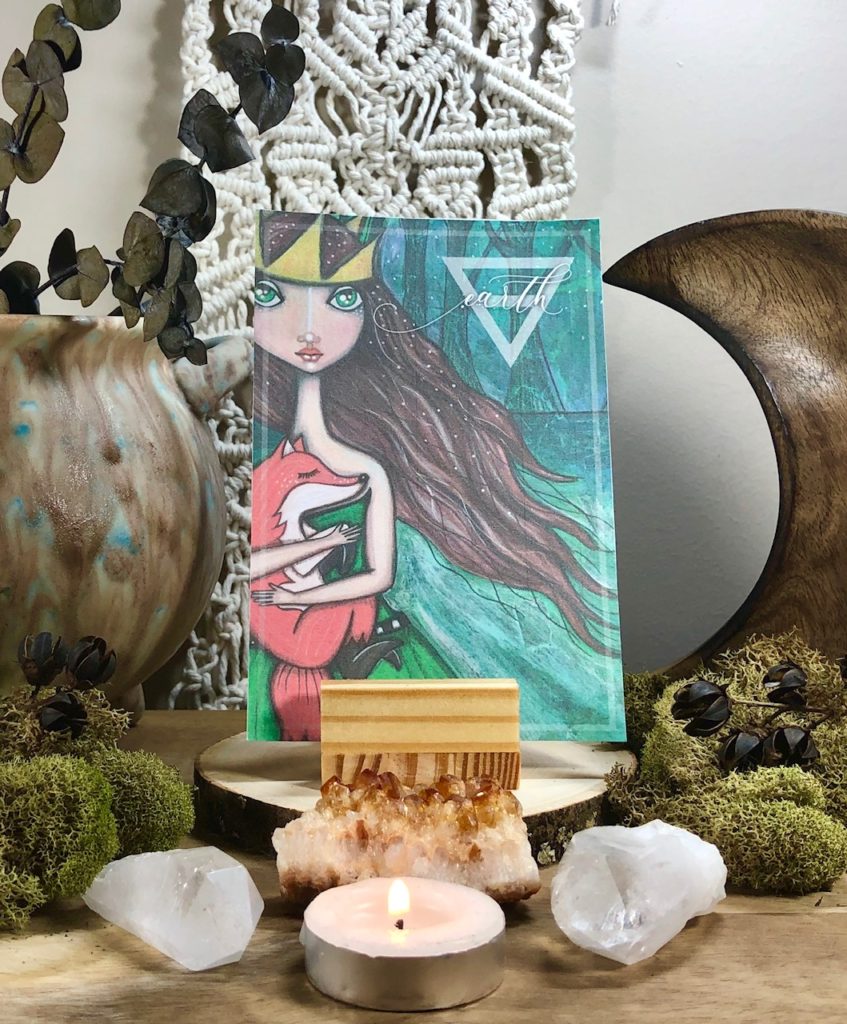
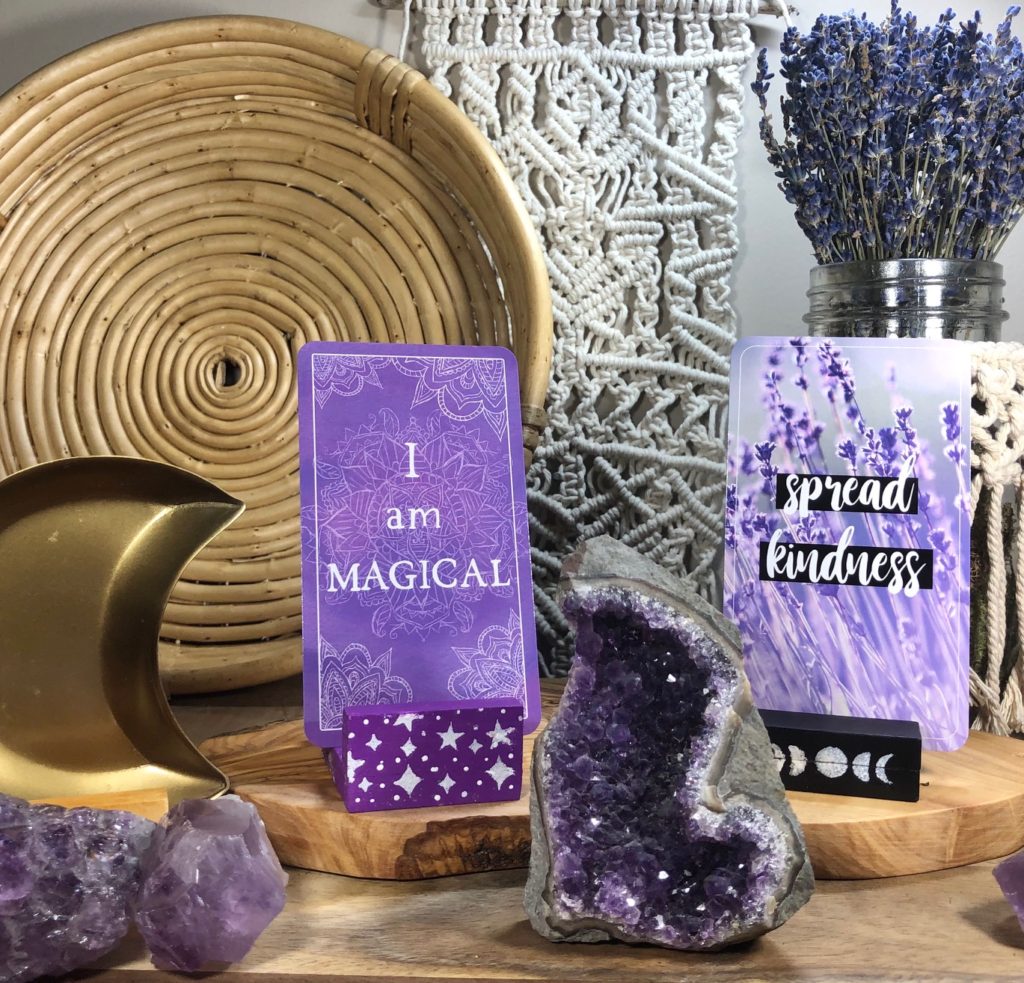
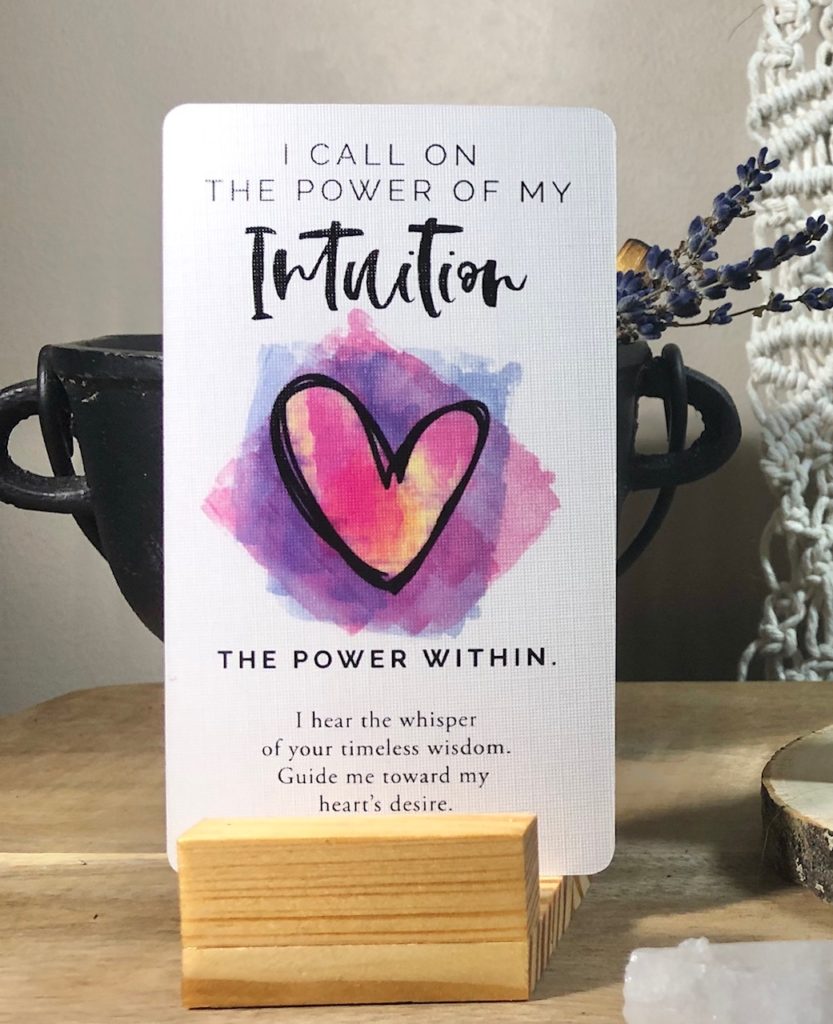
I use my decks pretty much daily, and I have my favorites. I also use them on my altar and in spells and other rituals. My decks are so beautiful that I wanted to start leaving them out so I could appreciate them longer, meditate on them, keep seeing them throughout the day to remind me of their messages and basically just because they are so pretty. I only recently started seeing the tarot card holders popping up in shops, and they are fantastic, but my magick is more personal to me when I create my tools myself. After watching some Dollar Tree decor videos on YouTube during the quarantine, I got this idea from watching crafters create home decor items (frames, trays) out of these little tumbling blocks. I recently picked a few packs up, grabbed my glue and designed some really simple tarot/oracle card holders. And there are enough blocks that you can make four holders out of one pack of blocks – that’s 25 cents a holder!!!! They only take minutes to make. Plus you can personalize them and paint them however you want to match your cards, your decor or your intentions.
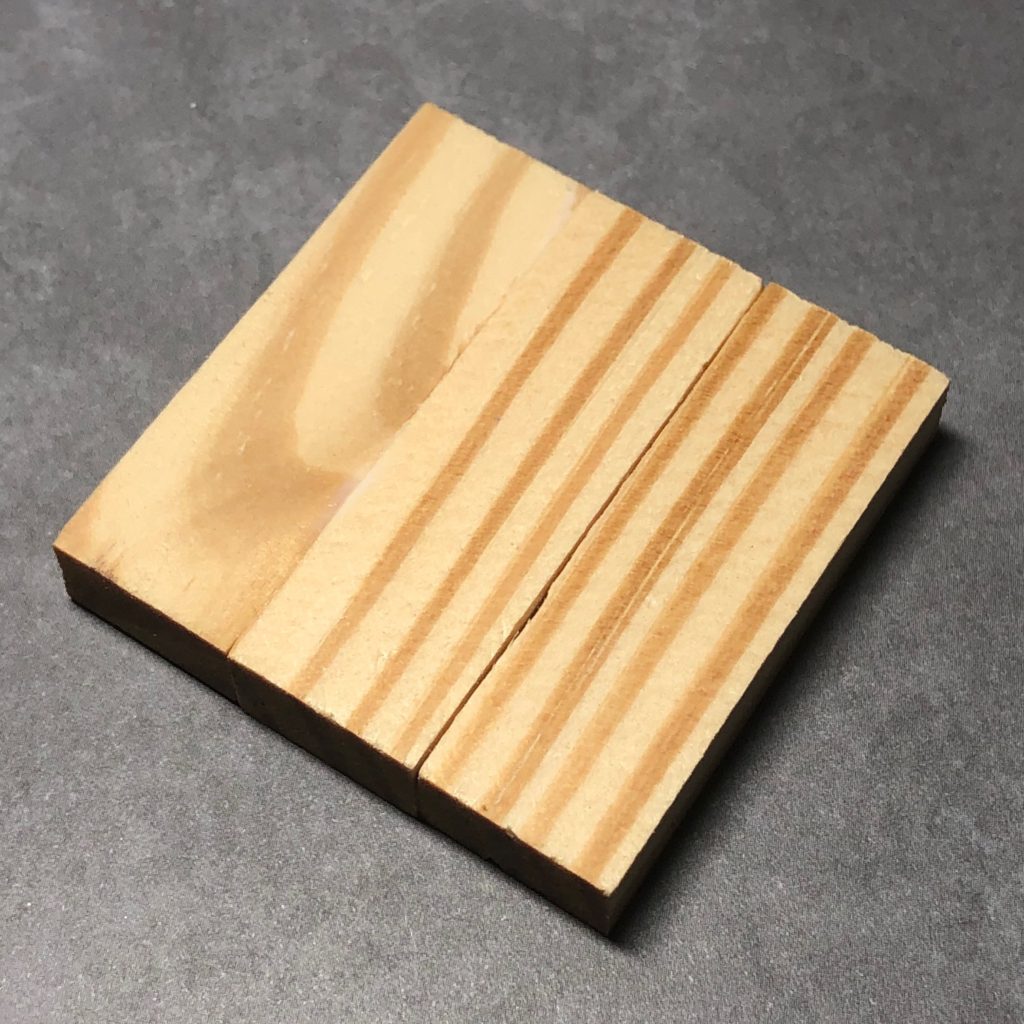
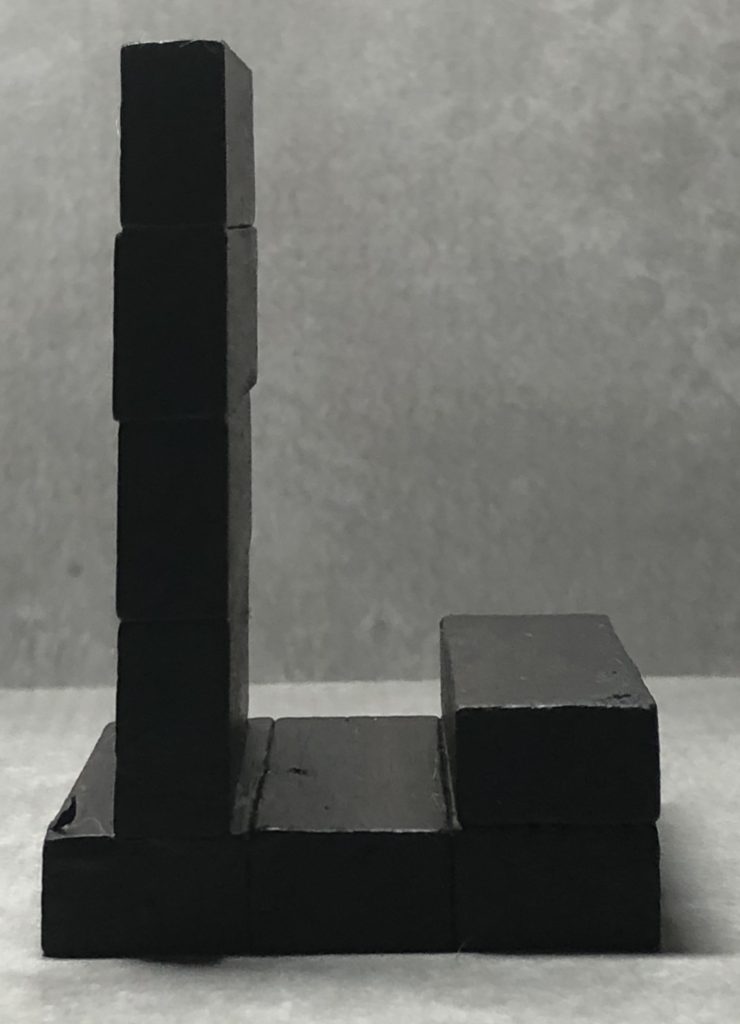
Here is a pack of the tumbling blocks from the Dollar Tree. You can find them in the toy section. The ones I got had natural blocks and brown painted blocks. You will need 8 blocks to make the holder, and that means you can make 4 holders out of one pack! If your Dollar Tree doesn’t have these, you can use kids’ wooden blocks or get a piece of wood trim from the hardware store and saw it into pieces.

You want to begin by gluing 3 blocks together for the base. I used Aleene’s Tacky Glue, and it held them great. You just need a good wood glue or all purpose adhesive.
Now, we are going to start the back. Glue one piece on its side toward the back of the base. I set my block in just a little because I didn’t want my card to lean too far back.
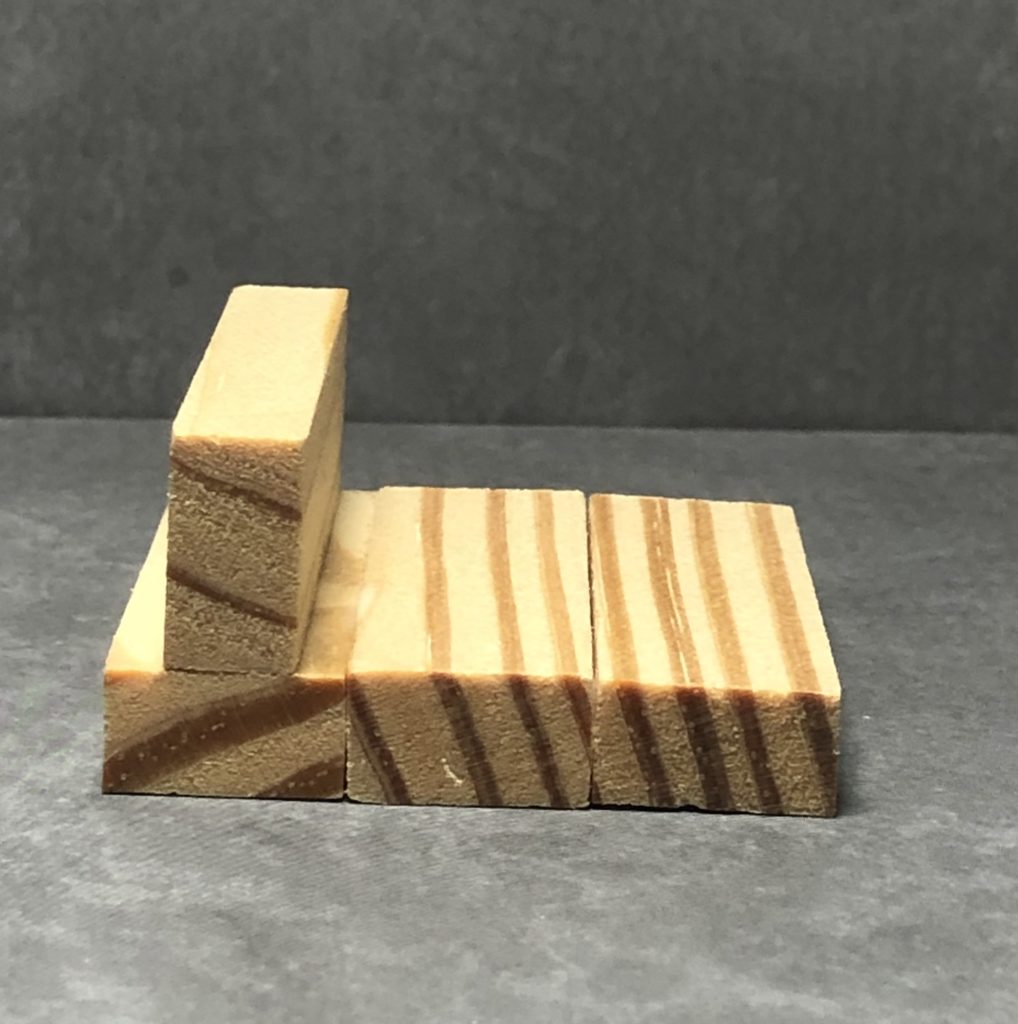
Now glue three more blocks on top of the one you just glued down to make the back. You can make it taller if you’d like, but I found that four blocks high will hold almost every size card I have.
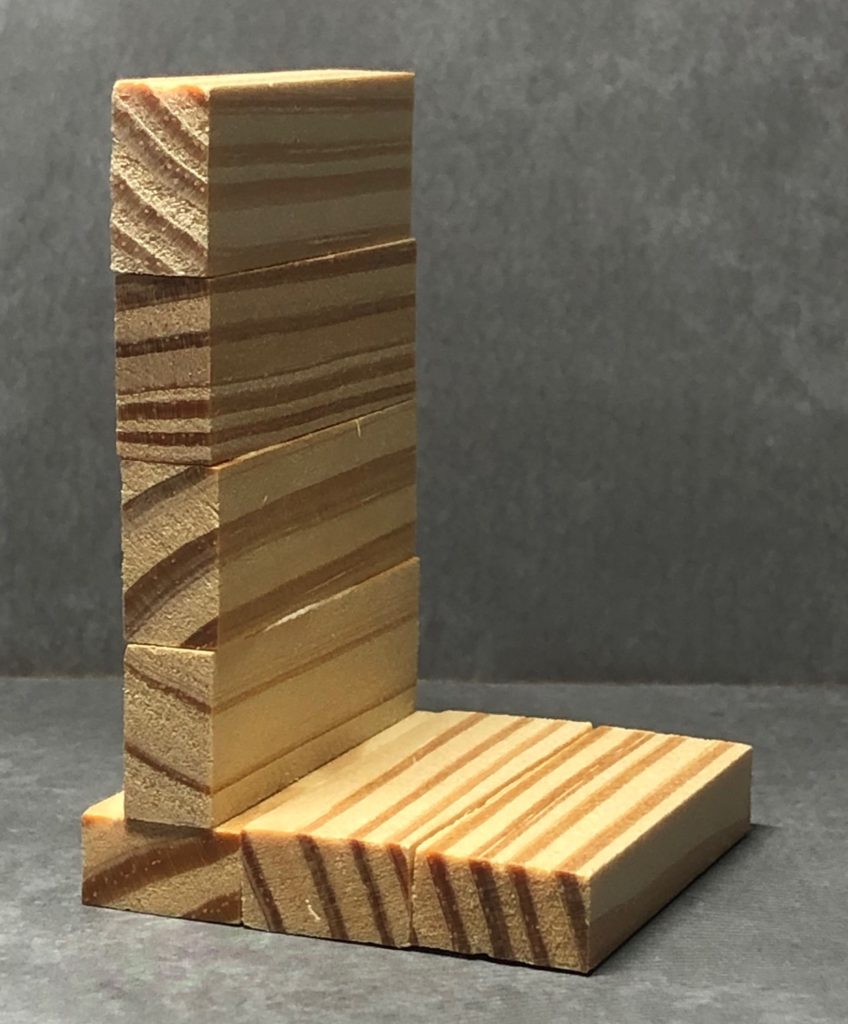
Now we are going to glue the last block on the front of the holder to keep the card from falling off. I like to line this one up flush with the front.
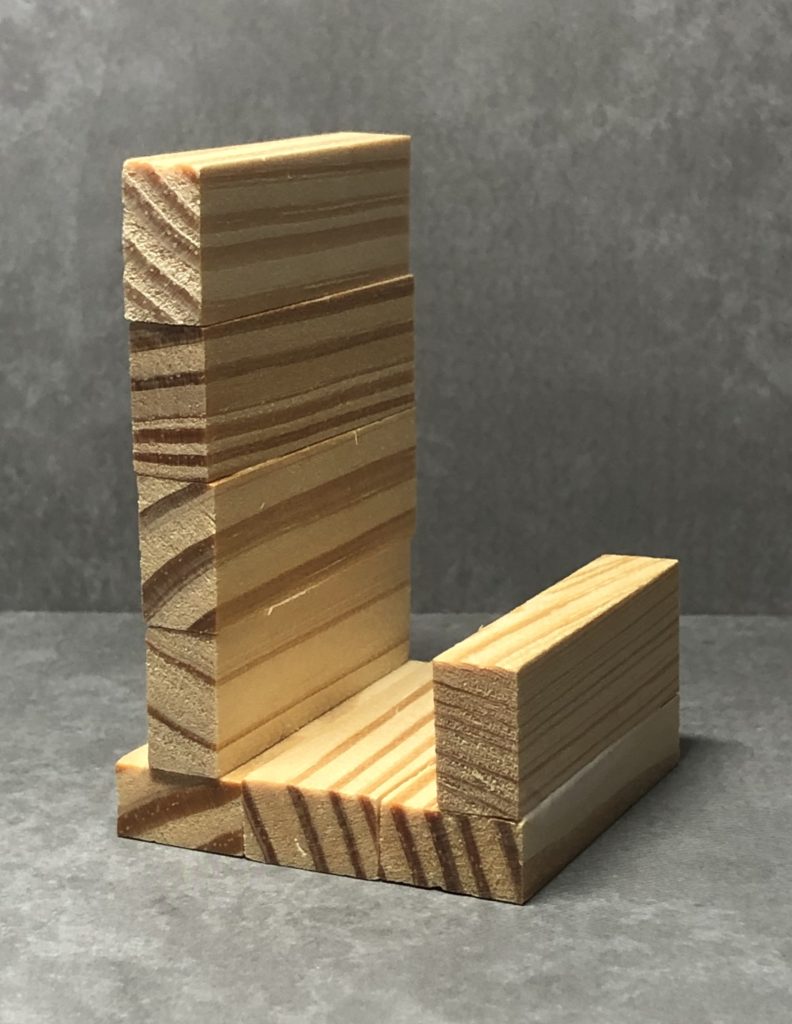
Alternately, you can you lay the block flat on the front. I find that this is helpful if your cards have words or messages at the bottom of the card that you’d like to read.
Now, you are done and you can paint it or decorate however you’d like. I used light wood varnish on some and painted and stenciled others. The edges of the blocks can be a little rough, so I sanded them before I painted and varnished them.
I wanted to show you one more variation. I decided I wanted one to hold an entire deck of cards, so I added an additional block to the base; I glued 4 blocks together instead of 3. I didn’t know if it would tip or not, but it didn’t. You can make many variations of this – make the bottom twice as wide for 2 cards, stack it up so you have varying heights or stairstep them like risers.

I would love to see your creations! If you make them, please post them as comments or tag me on Instagram (@thismagickallife) or Facebook (This Magickal Life).
You May Also Like
One Comment
Moon Owl Matron
Merry Meet!
Thank you for sharing this very clever and creative idea for Tarot Card holders. These are great! In the past, I’ve purchased boxes with dividers to help me sort my cards, but have found them to be quite bulky and somewhat pricey. I have quite a number of decks upwards of 70, and so I’ve accumulated quite a few boxes. Additionally, the box sizes are limited to containing about 5 decks at a time, at the most. So, I’m constantly changing out my decks and re-stacking them. I love the idea that these card holders are light enough to carry on the go, small is size, and can be artistically imbibed with one’s personal creative touch. Yah, these are super cool!